


Make the whole Baby Shark family and put on your own puppet theater musical!
Shark Character Puppets
Supplies:
- color construction paper (if you don’t have color paper you can use white paper and color your characters with markers/crayons/color pencils)
- glue stick (tape or liquid glue will work)
- something to make large and small circles (a compass or any cylindrical bottles/cups/jars you find at home can be used to trace circles, you can decide on their sizes, mine are approximately 3″ and 2″ in diameter)
- scissors
- pencil or pen
- optional: Popsicle sticks (unsharpened pencils will work)
- optional: googly eyes
- optional: a shoebox to make a diorama
- optional: white color pencil or crayon to draw teeth
- optional: markers/crayons/color pencils to add details
Instructions for Each Shark:
- select a color for your shark
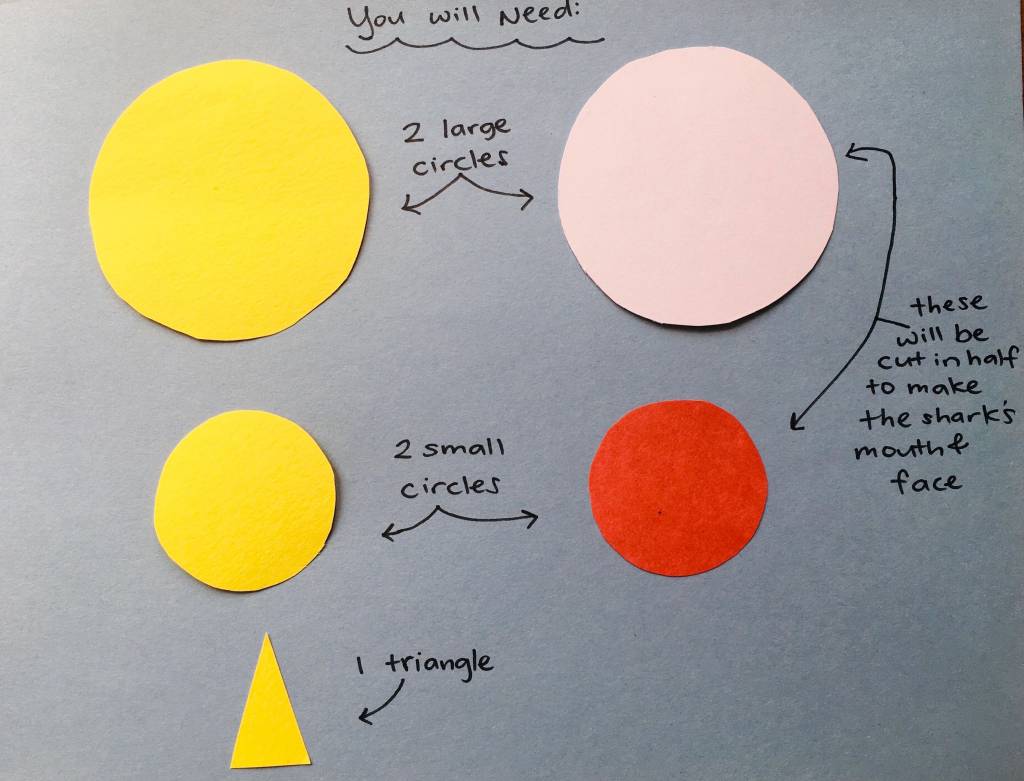
- cut two large circles of the same size, one from white paper and one in your selected color
- cut two small circles of the same size, one from red paper and one in your selected color
- cut out a triangle in your chosen color
- cut the white and red circles in half (you will only need a half circle of each color per shark)
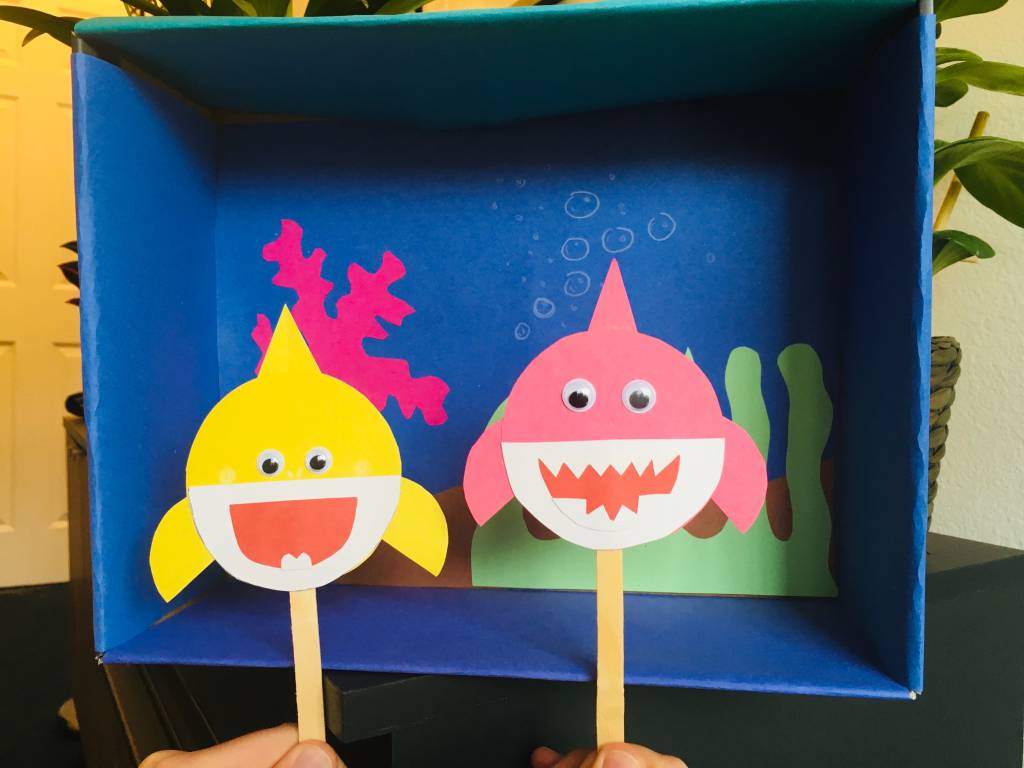
- layer the white half circle over the large color circle, glue it in place
- take the small circle, in your selected color, and cut it in half (these will be the arm/pectoral fins) tuck one on each side of your shark head and glue in place
- take the red half circle, this will be mouth, you can add zig-zag lines to make teeth or color in teeth with a white color pencil or crayon, you can also change the shape of the mouth to make a smile, it’s up to you!
- once the mouth is in place glue the googly eyes or make some out of white paper by cutting tiny circles with black marker dots in the center
- now glue the triangle paper to the top of the shark, this will be the to top/dorsal fin
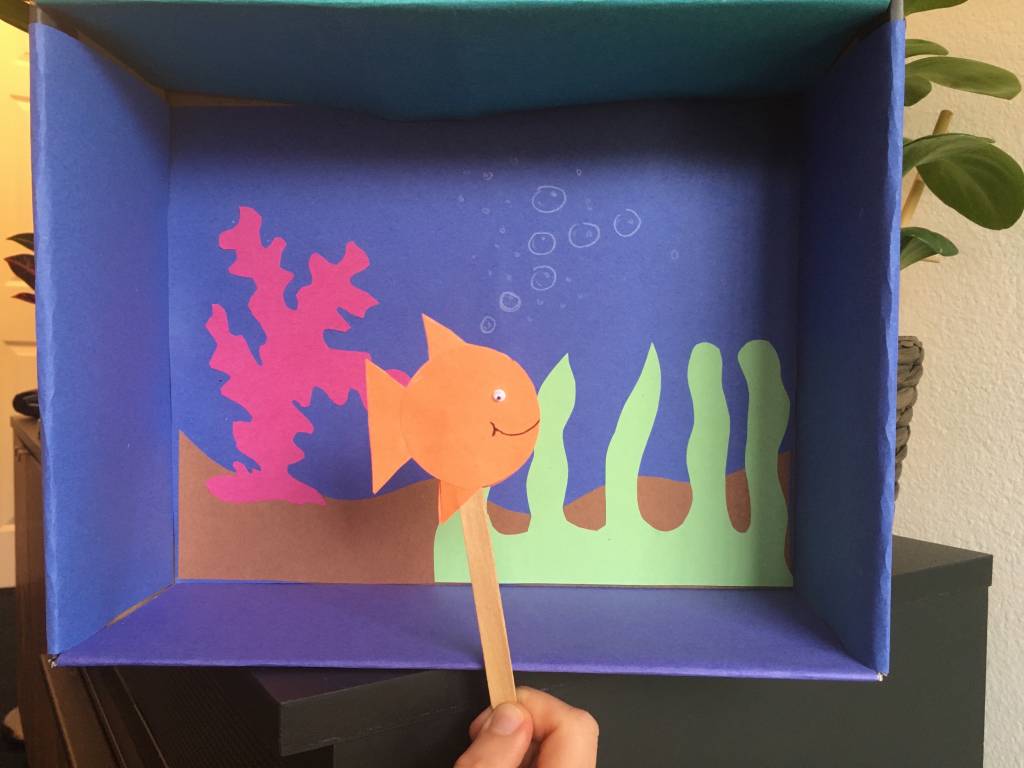
Instructions for the Little Fish:
- cut a small circle
- cut two triangles of the same size
- tuck one triangle at the side of the circle to make a tail
- cut the other triangle in half, tuck one at the top of the circle and one at the bottom to make the fins
- decorate a face
- optional, trace the outline of the completed fish to make a second fish cutout, decorate this one with a different facial expression and attached it to the back of the first fish
- don’t forget to glue the Popsicle stick in between
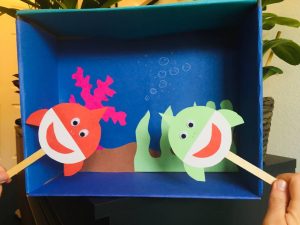
Instructions for the Ocean Scene:
- use a sheet of blue construction paper
- cut out anything you want to see in your ocean scene: seaweed, coral, sand, treasure chests, anchors, mermaids, sea creatures, etc.
- glue all your pieces onto the blue paper
- optional, glue the blue paper to the bottom of a shoe box and wrap the edges to make an ocean diorama
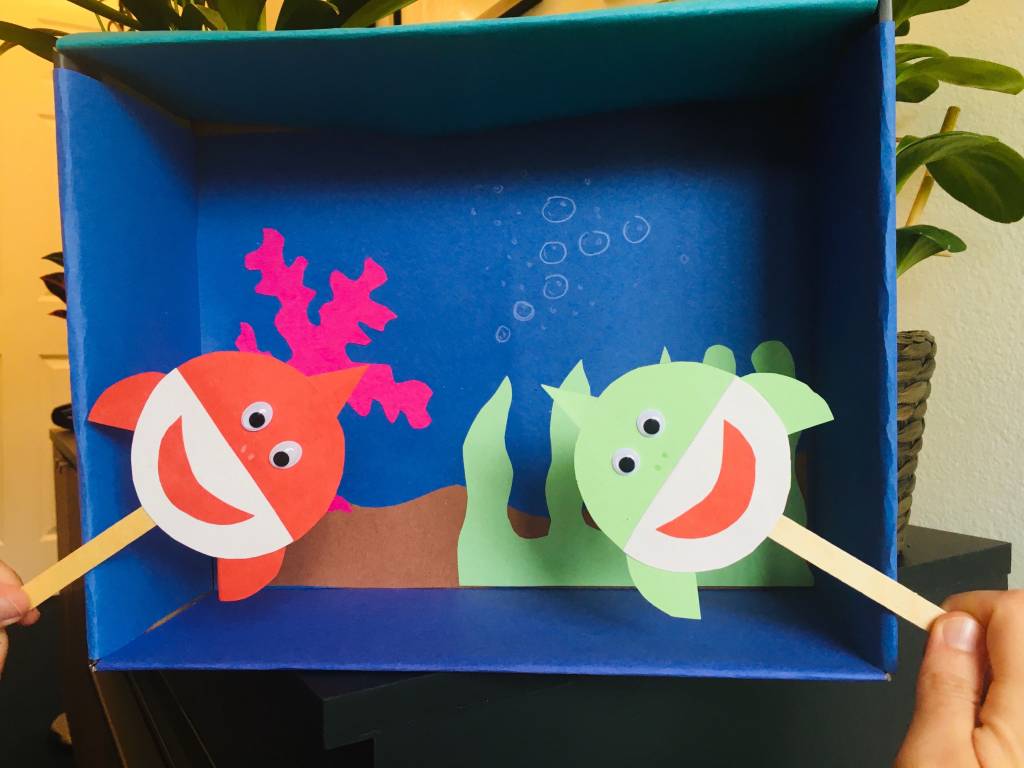
Now it’s time to get musical and put on your own puppet show! Have lots of fun and try singing different variations of Baby Shark!!

*if you make a diorama shoebox you can store your sharks and fish inside the box when you’re done playing with them 🙂
Tiburón Bebé
¡Haga a toda la familia del Bebé Tiburón y ponga su propio teatro musical de títeres!
Títeres de personajes tiburones
Materiales:
- Papel de construcción de color (si no tiene papel de color, puede usar papel blanco y colorear sus caracteres con marcadores / crayones / lápices de colores)
- Pegamento en barra (cinta o pegamento líquido funcionará)
- Algo para hacer círculos grandes y pequeños (compas o cualquier botella / vaso / frasco cilíndrico que encuentre en su casa puede usarse para trazar círculos, puede decidir su tamaño, el que se ha usado aquí mide aproximadamente 3 “y 2” de diámetro)
- Tijeras
- Lápiz o lapicero
- Opcional: palitos de paleta (los lápices sin punta funcionarán)
- Opcional: ojos saltones
- Opcional: una caja de zapatos para hacer un diorama
- Opcional: lápiz o crayón de color blanco para dibujar dientes
- Opcional: marcadores / crayones / lápices de colores para hacer detalles
Instrucciones para cada tiburón:
- Selecciona un color para tu tiburón
- Corte dos círculos grandes del mismo tamaño, uno de papel blanco y otro del color que usted seleccione.
- Corte dos círculos pequeños del mismo tamaño, uno de papel rojo y otro del color que usted seleccione
- Recorte un triángulo de su color preferido
- Corte los círculos blancos y rojos por la mitad (solo necesitarás un medio círculo de cada color por tiburón)
- Coloque el semicírculo blanco sobre el círculo de color grande, péguelo en su lugar
- Toma el círculo pequeño, en el color que usted selecciono, y córtelo por la mitad (estos serán las aletas del brazo / pectoral) coloca uno a cada lado de tu cabeza de tiburón y pégalo en su lugar
- Tome el semicírculo rojo, esto será boca, puede agregar líneas en zigzag para hacer dientes o colorear los dientes con un lápiz o crayón de color blanco, también puede cambiar la forma de la boca para hacer una sonrisa, depende de ¡usted!
- Una vez que la boca esté en su lugar, pegue los ojos saltones o hágalos de papel blanco cortando pequeños círculos con puntos negros en el centro
- Ahora pegue el triángulo de papel a la parte superior del tiburón, esta será la aleta superior / aleta dorsal
Instrucciones para el pequeño pez:
- Cortar un pequeño círculo
- Cortar dos triángulos del mismo tamaño
- Pegue un triángulo al costado del círculo para hacer una cola
- Corta el otro triángulo por la mitad, pegue uno en la parte superior del círculo y otro en la parte inferior para hacer las aletas
- Decorar la cara
- Opcionalmente, trace el contorno del pez terminado para usarlo de patrón y cortar un segundo pez, decore este con una expresión facial diferente y adhiéralo a la parte posterior del primer pez
- No olvide pegar el palito de paleta en el medio

Instrucciones para la escena del océano:
- Use una hoja de papel de construcción azul
- Recorta todo lo que quieras ver en tu escena oceánica: algas, corales, arena, cofres del tesoro, anclas, sirenas, criaturas marinas, etc.
- Pegue todas sus piezas en el papel azul
- Opcional, pegue el papel azul en el fondo de una caja de zapatos y envuelva los bordes para hacer un diorama del océano
¡Ahora es el momento de ponerse musical y montar su propio espectáculo de títeres! ¡Diviértete y prueba a cantar diferentes variaciones de Bebe Tiburón/Baby Shark!
* Si hace una caja de zapatos de diorama, puedes guardar tus tiburones y peces dentro de la caja cuando termines de jugar con ellos